Objectives and key results (OKR)
DETAILS: Tier: Ultimate Offering: GitLab.com, Self-managed
- Introduced in GitLab 15.6 with a flag named
okrs_mvc. Disabled by default.
OKRs are an experiment. For the OKR feature roadmap, see epic 7864.
FLAG:
On self-managed GitLab, by default this feature is not available. To make it available per project, an administrator can enable the featured flag named okrs_mvc.
On GitLab.com, by default this feature is not available, but can be configured by GitLab.com administrators.
On GitLab Dedicated, this feature is not available.
This feature is not ready for production use.
Objectives and key results (OKRs) are a framework for setting and tracking goals that are aligned with your organization's overall strategy and vision.
The objective and the key result in GitLab share many features. In the documentation, the term OKRs refers to both objectives and key results.
OKRs are a type of work item, a step towards default issue types in GitLab. For the roadmap of migrating issues and epics to work items and adding custom work item types, see epic 6033 or the Plan direction page.
Designing effective OKRs
Use objectives and key results to align your workforce towards common goals and track the progress. Set a big goal with an objective and use child objectives and key results to measure the big goal's completion.
Objectives are aspirational goals to be achieved and define what you're aiming to do. They show how an individual's, team's, or department's work impacts overall direction of the organization by connecting their work to overall company strategy.
Key results are measures of progress against aligned objectives. They express how you know if you have reached your goal (objective). By achieving a specific outcome (key result), you create progress for the linked objective.
To know if your OKR makes sense, you can use this sentence:
I/we will accomplish (objective) by (date) through attaining and achieving the following metrics (key results).
To learn how to create better OKRs and how we use them at GitLab, see the Objectives and Key Results handbook page.
Create an objective
To create an objective:
- On the left sidebar, select Search or go to and find your project.
- Select Plan > Issues.
- In the upper-right corner, next to New issue, select the down arrow {chevron-lg-down} and then select New objective.
- Select New objective again.
- Enter the objective title.
- Select Create objective.
To create a key result, add it as a child to an existing objective.
View an objective
To view an objective:
- On the left sidebar, select Search or go to and find your project.
- Select Plan > Issues.
-
Filter the list of issues
for
Type = objective. - Select the title of an objective from the list.
View a key result
To view a key result:
- On the left sidebar, select Search or go to and find your project.
- Select Plan > Issues.
-
Filter the list of issues
for
Type = key_result. - Select the title of a key result from the list.
Alternatively, you can access a key result from the Child objectives and key results section in its parent's objective.
Edit title and description
Prerequisites:
- You must have at least the Reporter role for the project.
To edit an OKR:
- Open the objective or key result that you want to edit.
- Optional. To edit the title, select it, make your changes, and select any area outside the title text box.
- Optional. To edit the description, select the edit icon ({pencil}), make your changes, and select Save.
View OKR system notes
- Introduced in GitLab 15.7 with a flag named
work_items_mvc_2. Disabled by default.- Moved to feature flag named
work_items_mvcin GitLab 15.8. Disabled by default.- Changing activity sort order introduced in GitLab 15.8.
- Filtering activity introduced in GitLab 15.10.
- Enabled on GitLab.com and self-managed in GitLab 15.10.
Prerequisites:
- You must have at least the Reporter role for the project.
You can view all the system notes related to the OKR. By default they are sorted by Oldest first. You can always change the sorting order to Newest first, which is remembered across sessions.
Comments and threads
You can add comments and reply to threads in OKRs.
Assign users
To show who is responsible for an OKR, you can assign users to it.
Users on GitLab Free can assign one user per OKR. Users on GitLab Premium and Ultimate can assign multiple users to a single OKR. See also multiple assignees for issues.
Prerequisites:
- You must have at least the Reporter role for the project.
To change the assignee on an OKR:
- Open the objective or key result that you want to edit.
- Next to Assignees, select Add assignees.
- From the dropdown list, select the users to add as an assignee.
- Select any area outside the dropdown list.
Assign labels
Prerequisites:
- You must have at least the Reporter role for the project.
Use labels to organize OKRs among teams.
To add labels to an OKR:
- Open the objective or key result that you want to edit.
- Next to Labels, select Add labels.
- From the dropdown list, select the labels to add.
- Select any area outside the dropdown list.
Add an objective to a milestone
- Introduced in GitLab 15.7.
You can add an objective to a milestone. You can see the milestone title when you view an objective.
Prerequisites:
- You must have at least the Reporter role for the project.
To add an objective to a milestone:
- Open the objective that you want to edit.
- Next to Milestone, select Add to milestone. If an objective already belongs to a milestone, the dropdown list shows the current milestone.
- From the dropdown list, select the milestone to be associated with the objective.
Set progress
- Setting progress for key results introduced in GitLab 15.8.
Show how much of the work needed to achieve an objective is finished.
You can set progress manually on objectives and key results.
When you enter progress for a child item, progress of all parent items in the hierarchy is updated to the average of the child items' progress. You can override progress at any level and enter a value manually, but when a child item's progress value is updated, the automation updates all parents again to show the average.
Prerequisites:
- You must have at least the Reporter role for the project.
To set progress of an objective or key result:
- On the left sidebar, select Search or go to and find your project.
- Select Plan > Issues.
-
Filter the list of issues
for
Type = objectiveorType = key resultand select your item. - Next to Progress, select the text box.
- Enter a number from 0 to 100.
Set health status
- Introduced in GitLab 15.7.
To better track the risk in meeting your goals, you can assign a health status to each objective and key result. You can use health status to signal to others in your organization whether OKRs are progressing as planned or need attention to stay on schedule.
Prerequisites:
- You must have at least the Reporter role for the project.
To set health status of an OKR:
- Open the key result that you want to edit.
- Next to Health status, select the dropdown list and select the desired health status.
Promote a key result to an objective
- Introduced in GitLab 16.0.
- Quick action
/promote_tointroduced in GitLab 16.1.
Prerequisites:
- You must have at least the Reporter role for the project.
To promote a key result:
- Open the key result.
- In the upper-right corner, select the vertical ellipsis ({ellipsis_v}).
- Select Promote to objective.
Alternatively, use the /promote_to objective quick action.
Copy objective or key result reference
- Introduced in GitLab 16.1.
To refer to an objective or key result elsewhere in GitLab, you can use its full URL or a short reference, which looks like
namespace/project-name#123, where namespace is either a group or a username.
To copy the objective or key result reference to your clipboard:
- On the left sidebar, select Search or go to and find your project.
- Select Plan > Issues, then select your objective or key result to view it.
- In the upper-right corner, select the vertical ellipsis ({ellipsis_v}), then select Copy Reference.
You can now paste the reference into another description or comment.
Read more about objective or key result references in GitLab-Flavored Markdown.
Copy objective or key result email address
- Introduced in GitLab 16.1.
You can create a comment in an objective or key result by sending an email. Sending an email to this address creates a comment that contains the email body.
For more information about creating comments by sending an email and the necessary configuration, see Reply to a comment by sending email.
To copy the objective's or key result's email address:
- On the left sidebar, select Search or go to and find your project.
- Select Plan > Issues, then select your issue to view it.
- In the upper-right corner, select the vertical ellipsis ({ellipsis_v}), then select Copy objective email address or Copy key result email address.
Close an OKR
When an OKR is achieved, you can close it. The OKR is marked as closed but is not deleted.
Prerequisites:
- You must have at least the Reporter role for the project.
To close an OKR:
- Open the objective that you want to edit.
- Next to Status, select Closed.
You can reopen a closed OKR the same way.
Child objectives and key results
In GitLab, objectives are similar to key results. In your workflow, use key results to measure the goal described in the objective.
You can add child objectives to a total of 9 levels. An objective can have up to 100 child OKRs. Key results are children of objectives and cannot have children items themselves.
Child objectives and key results are available in the Child objectives and key results section below an objective's description.
Add a child objective
- Ability to select which project to create the objective in introduced in GitLab 17.1.
Prerequisites:
- You must have at least the Guest role for the project.
To add a new objective to an objective:
- In an objective, in the Child objectives and key results section, select Add and then select New objective.
- Enter a title for the new objective.
- Select a project to create the new objective in.
- Select Create objective.
To add an existing objective to an objective:
-
In an objective, in the Child objectives and key results section, select Add and then select Existing objective.
-
Search for the desired objective by entering part of its title, then selecting the desired match.
To add multiple objectives, repeat this step.
-
Select Add objective.
Add a child key result
- Ability to select which project to create the key result in introduced in GitLab 17.1.
Prerequisites:
- You must have at least the Guest role for the project.
To add a new key result to an objective:
- In an objective, in the Child objectives and key results section, select Add and then select New key result.
- Enter a title for the new key result.
- Select a project to create the new key result in.
- Select Create key result.
To add an existing key result to an objective:
-
In an objective, in the Child objectives and key results section, select Add and then select Existing key result.
-
Search for the desired OKR by entering part of its title, then selecting the desired match.
To add multiple objectives, repeat this step.
-
Select Add key result.
Reorder objective and key result children
- Introduced in GitLab 16.0.
Prerequisites:
- You must have at least the Reporter role for the project.
By default, child OKRs are ordered by creation date. To reorder them, drag them around.
Schedule OKR check-in reminders
- Introduced in GitLab 16.4 with a flag named
okr_checkin_reminders. Disabled by default.
FLAG:
On self-managed GitLab, by default this feature is not available. To make it available, an administrator can enable the feature flag named okr_checkin_reminders.
On GitLab.com and GitLab Dedicated, this feature is not available.
This feature is not ready for production use.
Schedule check-in reminders to remind your team to provide status updates on the key results you care about. Reminders are sent to all assignees of descendant objects and key results as email notifications and to-do items. Users can't unsubscribe from the email notifications, but check-in reminders can be turned off. Reminders are sent on Tuesdays.
Prerequisites:
- You must have at least the Reporter role for the project.
- There must be at least one objective with at least one key result in the project.
- You can schedule reminders only for top-level objectives. Scheduling a check-in reminder for child objectives has no effect. The setting from the top-level objective is inherited to all child objectives.
To schedule a recurring reminder for an objective, in a new comment use the /checkin_reminder <cadence>
quick action.
The options for <cadence> are:
weeklytwice-monthlymonthly-
never(default)
For example, to schedule a weekly check-in reminder, enter:
/checkin_reminder weeklyTo turn off a check-in reminder, enter:
/checkin_reminder neverSet an objective as a parent
- Introduced in GitLab 16.6.
Prerequisites:
- You must have at least the Reporter role for the project.
- The parent objective and child OKR must belong to the same project.
To set an objective as a parent of an OKR:
- Open the objective or key result that you want to edit.
- Next to Parent, from the dropdown list, select the parent to add.
- Select any area outside the dropdown list.
To remove the parent of the objective or key result, next to Parent, select the dropdown list and then select Unassign.
Confidential OKRs
- Introduced in GitLab 15.3.
Confidential OKRs are OKRs visible only to members of a project with sufficient permissions. You can use confidential OKRs to keep security vulnerabilities private or prevent surprises from leaking out.
Make an OKR confidential
By default, OKRs are public. You can make an OKR confidential when you create or edit it.
In a new OKR
When you create a new objective, a checkbox right below the text area is available to mark the OKR as confidential.
Select that checkbox and then select Create objective or Create key result to create the OKR.
In an existing OKR
Prerequisites:
- You must have at least the Reporter role for the project.
- A confidential objective can have only confidential
child objectives or key results:
- To make an objective confidential: If it has any child objectives or key results, you must first make all of them confidential or remove them.
- To make an objective non-confidential: If it has any child objectives or key results, you must first make all of them non-confidential or remove them.
- To add child objectives or key results to a confidential objective, you must first make them confidential.
To change the confidentiality of an existing OKR:
- Open the objective or key result.
- In the upper-right corner, select the vertical ellipsis ({ellipsis_v}).
- Select Turn on confidentiality or Turn off confidentiality.
Who can see confidential OKRs
When an OKR is made confidential, only users with at least the Reporter role for the project have access to the OKR. Users with Guest or Minimal roles can't access the OKR even if they were actively participating before the change.
However, a user with the Guest role can create confidential OKRs, but can only view the ones that they created themselves.
Users with the Guest role or non-members can read the confidential OKR if they are assigned to the OKR. When a Guest user or non-member is unassigned from a confidential OKR, they can no longer view it.
Confidential OKRs are hidden in search results for users without the necessary permissions.
Confidential OKR indicators
Confidential OKRs are visually different from regular OKRs in a few ways. Wherever OKRs are listed, you can see the confidential ({eye-slash}) icon next to the OKRs that are marked as confidential.
If you don't have enough permissions, you cannot see confidential OKRs at all.
Likewise, while inside the OKR, you can see the confidential ({eye-slash}) icon right next to the breadcrumbs.
Every change from regular to confidential and vice versa, is indicated by a system note in the OKR's comments, for example:
- {eye-slash} Jo Garcia made the issue confidential 5 minutes ago
- {eye} Jo Garcia made the issue visible to everyone just now
Lock discussion
- Introduced in GitLab 16.9 with a flag named
work_items_beta. Disabled by default.
FLAG:
On self-managed GitLab, by default this feature is not available. To make it available, an administrator can enable the feature flag named work_items_beta.
On GitLab.com and GitLab Dedicated, this feature is not available.
This feature is not ready for production use.
You can prevent public comments in an OKR. When you do, only project members can add and edit comments.
Prerequisites:
- You must have at least the Reporter role.
To lock an OKR:
- In the upper-right corner, select the vertical ellipsis ({ellipsis_v}).
- Select Lock discussion.
A system note is added to the page details.
If an OKR is closed with a locked discussion, then you cannot reopen it until the discussion is unlocked.
Two-column layout
DETAILS: Status: Beta
- Introduced in GitLab 16.2 with a flag named
work_items_mvc_2. Disabled by default. This feature is in beta.- Moved to feature flag named
work_items_betain GitLab 16.10. Disabled by default.
FLAG:
On self-managed GitLab, by default this feature is not available. To make it available per group, an administrator can enable the feature flag named work_items_beta.
On GitLab.com and GitLab Dedicated, this feature is not available.
This feature is not ready for production use.
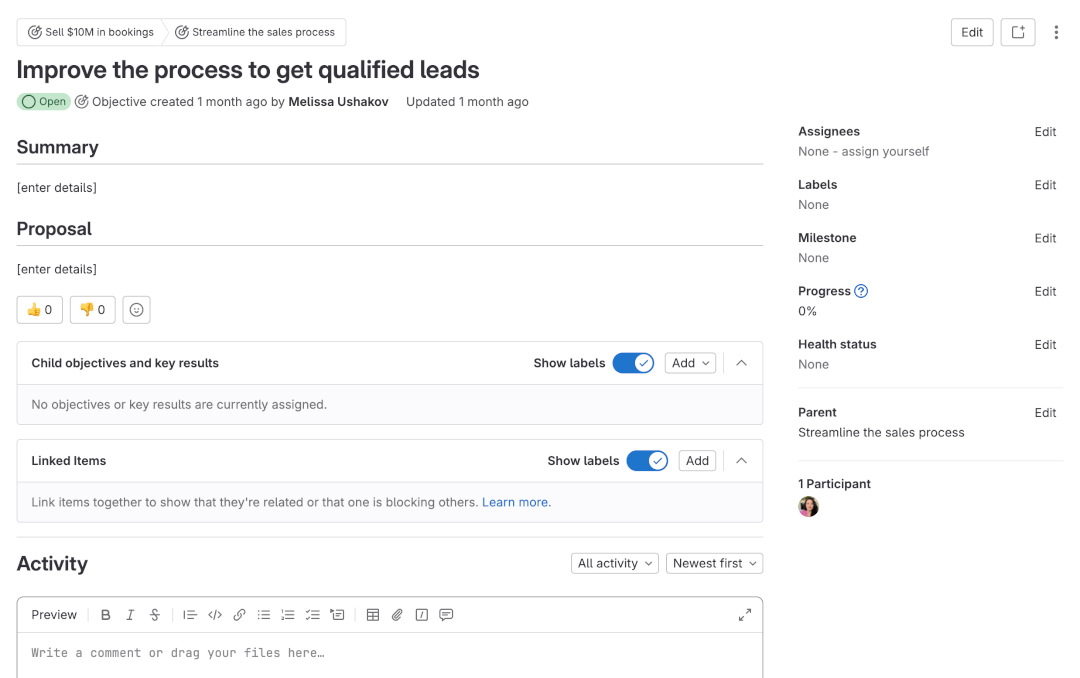
When enabled, OKRs use a two-column layout, similar to issues. The description and threads are on the left, and attributes, such as labels or assignees, on the right.
This feature is in beta. If you find a bug, comment on the feedback issue.
Linked items in OKRs
- Introduced in GitLab 16.5 with a flag named
linked_work_items. Enabled by default.- Enabled on GitLab.com and self-managed in GitLab 16.7.
- Adding related items by entering their URLs and IDs introduced in GitLab 16.8.
- Generally available in GitLab 17.0. Feature flag
linked_work_itemsremoved.- Changed minimum required role from Reporter (if true) to Guest in GitLab 17.0.
Linked items are a bi-directional relationship and appear in a block below the Child objectives and key results. You can link an objective, key result, or a task in the same project with each other.
The relationship only shows up in the UI if the user can see both items.
Add a linked item
Prerequisites:
- You must have at least the Guest role for the project.
To link an item to an objective or key result:
- In the Linked items section of an objective or key result, select Add.
- Select the relationship between the two items. Either:
- Relates to
- Blocks
- Is blocked by
- Enter the search text of the item, URL, or its reference ID.
- When you have added all the items to be linked, select Add below the search box.
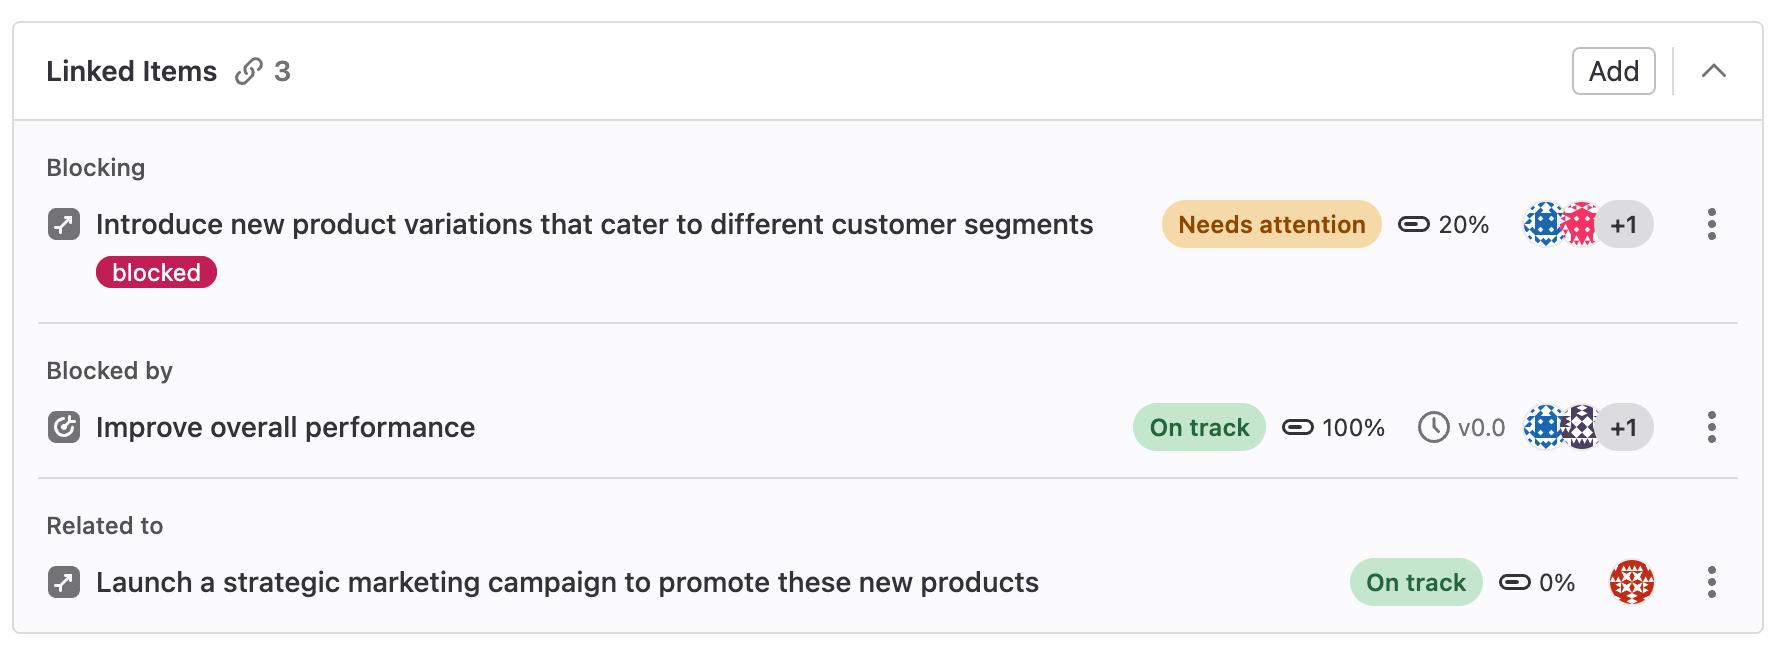
When you have finished adding all linked items, you can see them categorized so their relationships can be better understood visually.
Remove a linked item
Prerequisites:
- You must have at least the Guest role for the project.
In the Linked items section of an objective or key result, next to each item, select the vertical ellipsis ({ellipsis_v}) and then select Remove.
Due to the bi-directional relationship, the relationship no longer appears in either item.